
What is the Wobble Broaching Tool used for?
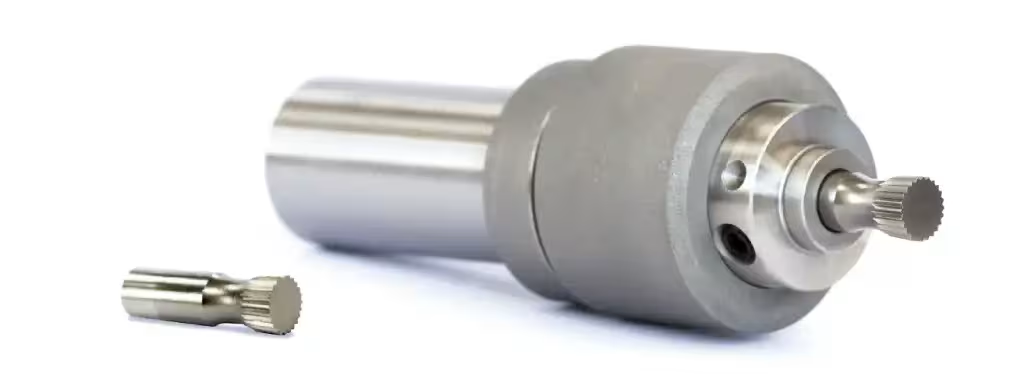
The wobble broach cuts a ring of serrations into the counterbore of a prepared hole. These serrations give the insert’s external locking features a matching profile to engage when the insert is swaged. Broaching takes place before the insert is screwed into the hole; it does not install or swage the insert.
Pre-broaching is particularly important when the parent material is too hard for the insert’s locking features to form the required serrations reliably during swaging. For Crownserts®, Anemo Engineering recommends it in materials above 187 HB. In softer materials, a separate broaching operation is typically not required. Always follow the requirements for the selected insert and application.
Why Is It Called a Wobble Broach?
The broach is a cutting tool shaped to produce the required serration pattern. It is mounted in a dedicated holder that sets its axis at a slight angle to the machine spindle. As the tool advances, the cutting pressure moves around its edge, creating the characteristic wobbling action.
This action cuts the serrations progressively rather than forcing the entire cutting edge into the material at once. The broach and holder must be matched to the insert and the prepared counterbore: the number and size of the serrations vary between insert sizes and series.
Where Does Broaching Fit in the Installation Process?
First, the hole and counterbore are machined to the dimensions specified for the insert. Where pre-broaching is required, the wobble broach cuts serrations into that counterbore. The hole is also tapped to receive the insert’s external thread. Follow the specified preparation sequence for the tooling being used, and remove any burrs or chips left by broaching before fitting the insert.
The insert is then screwed to the required depth. Its external serrations should line up with those in the counterbore before the swaging operation locks it in place. Anemo Engineering’s Hand Installation Tool combines the subsequent wrenching and swaging steps; the wobble broach remains a separate hole preparation tool.
Getting a Clean, Accurate Result
Good broaching starts with a correctly sized counterbore and a lead-in for the tool. The workpiece must be held rigidly, and the broach holder must run freely and be in good condition. The broach should be fed to the specified serration depth without striking the bottom of the counterbore.
Suitable cutting conditions and lubricant matter, especially in demanding materials such as titanium and nickel alloys. A worn broach, flexible setup, unsuitable feed or damaged holder can leave shallow or uneven serrations or chip the cutting edge. Speeds, feeds and depths should come from the instructions for the particular tool, material and insert.
Checking the Hole Before Installation
After broaching, clear the hole of chips and burrs and inspect the serrations. A matching serration gage can check that they have reached the required depth and form; the counterbore and tapped thread should also be checked against their specifications. These checks help identify a preparation problem before an insert is fitted.
Once the prepared hole passes inspection, the insert can be positioned and swaged. The wobble broach has done its job when the counterbore has the correctly formed serrations needed for that final mechanical lock.